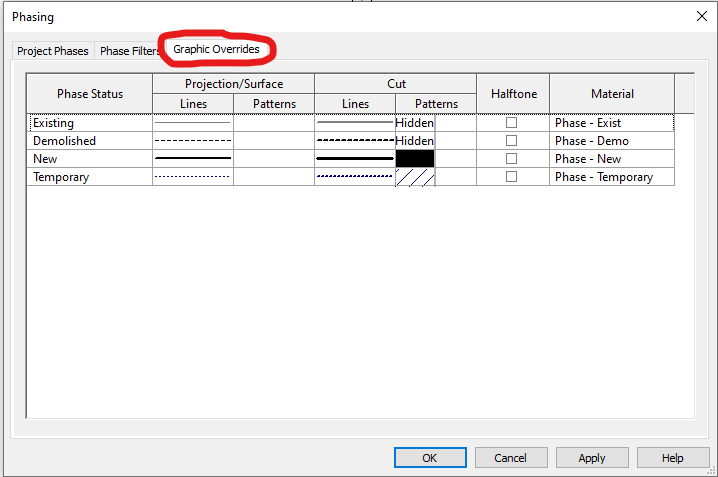
Revit’s Phasing Feature: Graphic Overrides
Revit’s phasing feature uses graphic overrides to visually distinguish elements based on their phase status. Here’s a simplified breakdown:
Phase Status Overrides
- New Elements
- Created in the current phase
- Often bold or distinctly colored
- Customizable: color, line weight, pattern, material
- Existing Elements
- Created in earlier phases
- Typically halftone or lighter weight
- Less prominent than new elements
- Demolished Elements
- Marked for removal in current phase
- Often dashed lines or special colors (e.g., red)
- Can use specific “demolished” patterns
- Temporary Elements
- Created and demolished in same phase
- Unique patterns or styles to indicate impermanence
Additional Override Options
- Material Overrides: Assign specific materials to each phase status
- Line Styles: Customize cut and projection lines
- Fill Patterns: Useful for sections/elevations to show different conditions
- Halftone/Transparency: Make certain elements less prominent
Phase Filters
- Control how elements from different phases appear in views
- Options: By Category, Overridden, or Not Displayed
Implementation
Access these settings via the Phases dialog under the Manage tab, then navigate to the Graphic Overrides tab.


These overrides help architects and engineers clearly communicate project timelines and evolution, from existing conditions through future phases.
Note that the four “Phase Status” designations never change, no matter how many phases you add to your projects. Your current view phase is “New”, and the one before it is now “Existing”.
