Revit’s cut line styles feature allows precise control over architectural, MEP, and structural design elements, significantly impacting drawing clarity. Here’s a comprehensive look at Revit cut lines, their customization, and importance.
Customization Process
To customize cut line styles in a view:
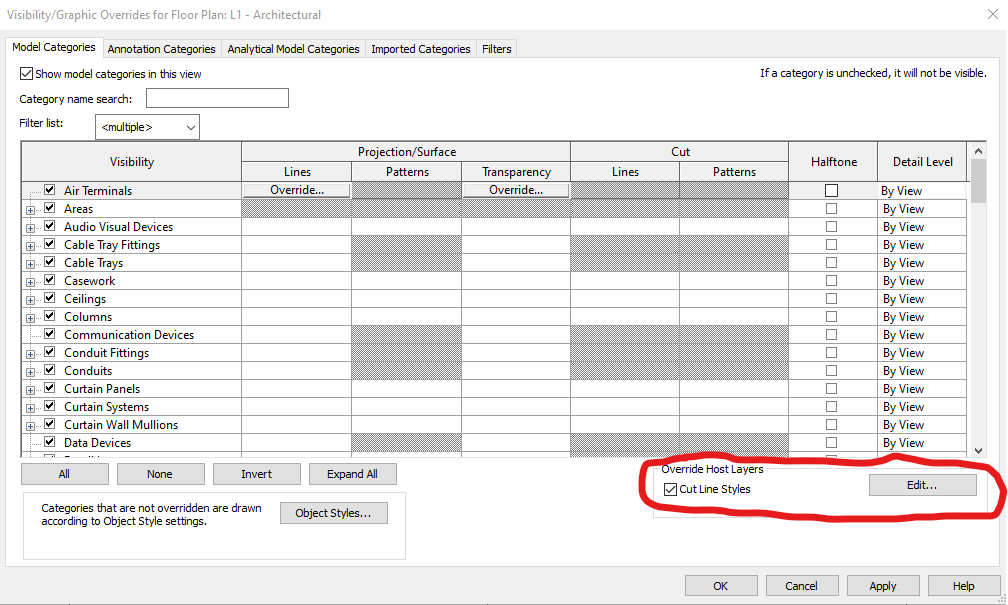
- Navigate to View > Visibility Graphics > Override Host Layers > Cut Line Styles
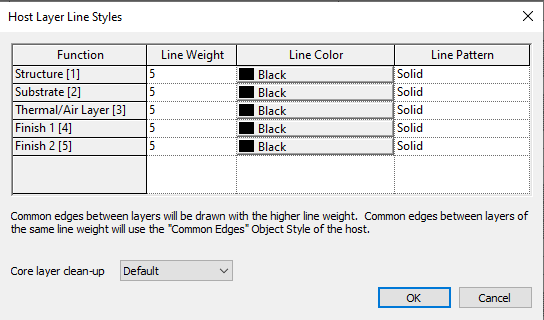
- In the Host Layer Line Styles dialog, select functions (e.g., Structure, Substrate, Finish)
- Adjust line weights, colors, and patterns as needed
Understanding Cut Line Styles
Cut lines in Revit reveal internal details of elements intersected by section or elevation planes. They can be customized in three main ways:
- Line Weight: Determines line thickness
- Line Color: Differentiates materials or importance
- Line Pattern: Distinguishes element types or highlights specific details
For specific wall cut lines:
- Go to Object Styles > Model Categories > Walls > Common Edges
- Use Cut Line Styles in visibility/graphics overrides
Benefits of Customization
- Improved clarity for complex overlapping elements
- Enhanced professionalism in drawings
- Better communication in collaborative environments
Best Practices
- Maintain consistency across project documents by including in view templates
- Use contrast to highlight important elements
- Avoid overcomplication by limiting different styles
By mastering Revit cut line styles, designers can transform complex data into clear, actionable information, effectively communicating design intent to all project stakeholders.