Understanding “” Line Style and View Range in Revit
The “” line style in Revit is an essential feature that works in conjunction with the View Range to enhance the clarity of plan views. Here’s a simplified explanation of how they interact:
View Range Basics
View Range in Revit defines element visibility in plan views using four key planes:
- Top: Upper visibility limit
- Cut Plane: Where elements are sectioned
- Bottom: Primary lower visibility limit
- View Depth: Extends visibility below the bottom plane
Note: For reflected ceiling plans, the View Depth extends above the Top plane.
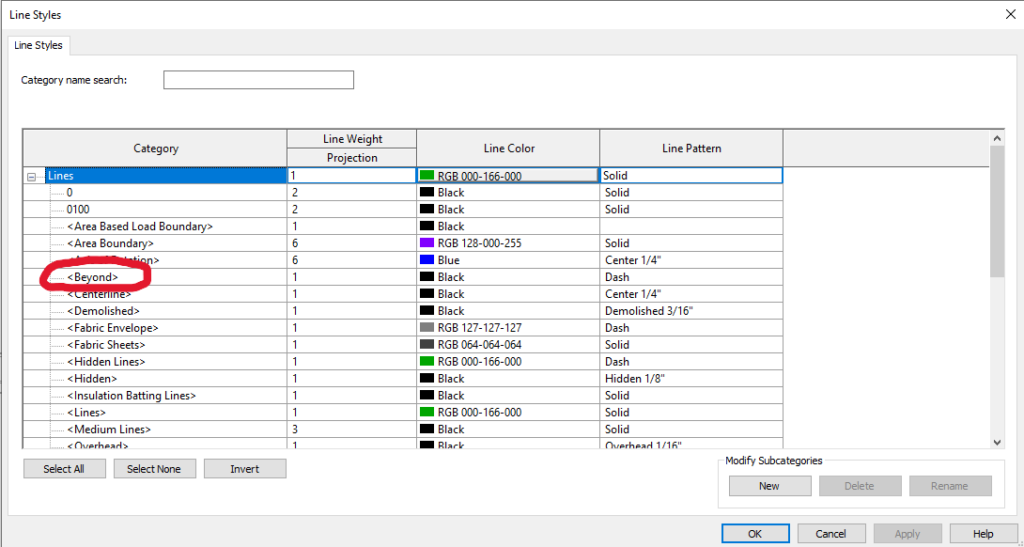
The <Beyond> Line Style
Purpose and Appearance
- Applied to elements between the Bottom plane and View Depth
- Typically appears as a lighter, dashed, or dotted line
- Indicates elements below normal visibility but within view depth
Usage
- In plan views: Shows elements like foundations or underground utilities
Control and Customization
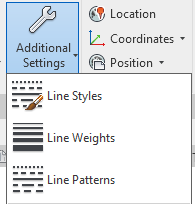
- Modify line styles: Manage > Additional Settings > Line Styles
- Adjust view-specific settings: Visibility/Graphics Overrides


Key Considerations
- Special cases: Some elements (e.g., floors, stairs) have unique display settings
- Project-wide impact: Affects all views unless changed
- View Range adjustments: Directly influences “” style usage
By mastering these concepts, you can create clearer Revit plans that effectively communicate depth without overwhelming the primary design elements.
